The timeline for installing a commercial fence can vary considerably depending on several key factors. Understanding these variables helps property owners and project managers set realistic expectations while ensuring the smooth completion of their fencing project. On average, a commercial fence installation can take between a few days to several weeks. Below, we’ll explore the steps involved in the process and highlight what affects these timeframes.
Typical Timeframes for Commercial Fence Installation
- Small-scale projects: 3–5 days
- Medium-scale projects: 7–14 days
- Large-scale projects or custom designs: Several weeks to months
These durations include all stages of the process, from planning to final inspection, though each step varies based on specific circumstances.
Key Factors Impacting Installation Timelines
- Type of Fencing Material
Different fencing materials have different preparation and installation requirements: - Chain-link fences: Easy to install and generally quicker than other materials.
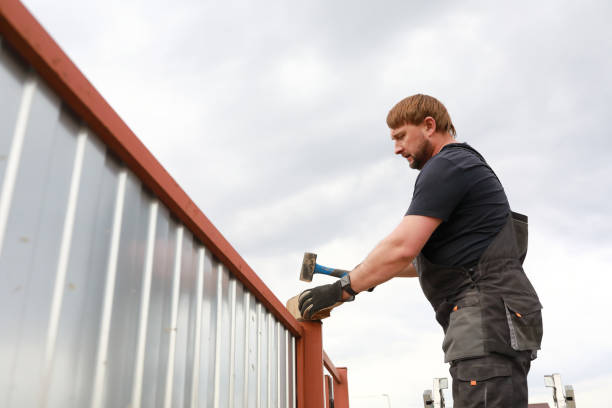
- Steel or wrought iron fences: Require more time due to their weight and need for precision welding or anchoring.
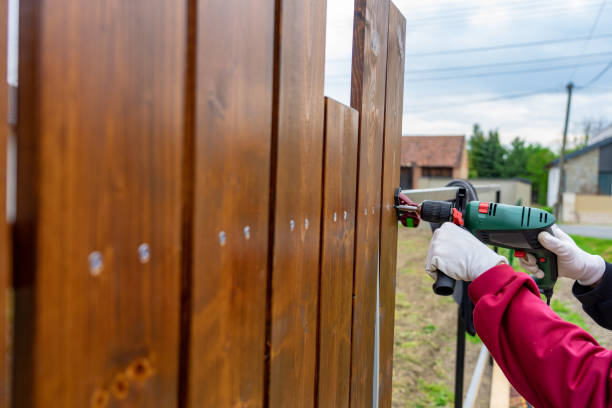
- Wooden fences: Installation may take longer if staining, sealing, or custom designs are involved.
- Site Preparation
The condition of the installation site has a significant impact: - Uneven terrain may require grading or leveling before installation can begin.
- Soil conditions, like rocky ground or clay-heavy areas, can increase excavation time.
- Pre-existing structures (such as old fences) may need to be removed.
- Permitting and Zoning Requirements
Securing permits from local authorities can delay work if not planned ahead of time. Some regions impose strict guidelines regarding fence height, material types, and proximity to boundaries. - Weather Conditions
Unfavorable weather – such as heavy rain, snow, or high winds – can halt progress on outdoor construction projects like fencing installations. - Size of the Property
Larger properties naturally require more materials, labor hours, and equipment usage compared to smaller areas. - Customization Needs
Custom designs that involve intricate patterns or unique features may extend the timeline due to additional fabrication work.
Strategies to Streamline Installation Timelines
To minimize delays during your commercial fencing project: – Work with an experienced contractor familiar with local regulations. – Plan ahead by obtaining all necessary permits before starting construction. – Communicate clearly about customization needs during initial discussions. – Schedule installations during favorable weather seasons whenever possible.
| Factor | Impact on Timeline | Example |
| Material Type | Faster for chain-link; slower for custom steel | Chain-link (quick), ornamental iron (longer) |
| Site Conditions | May involve grading/leveling | Preparing uneven terrain |
| Permits/Zoning | Delays if not pre-approved | Local zoning height restrictions |
| Property Size | Larger properties take more time | Industrial parks vs small businesses |
Understanding these factors is essential for effective planning and execution of a commercial fence project while reducing unforeseen challenges that could extend timelines unnecessarily.
Key Stages of Commercial Fence Installation with a Trusted Fence Company Gainesville FL
1. Initial Consultation and Site Assessment for Fence Repair Gainesville FL
The process begins with an in-depth consultation between the property owner and fencing professionals. During this phase:
– The purpose of the fence is identified (e.g., security, privacy, aesthetics). – A site survey is conducted to assess terrain, boundaries, and potential obstacles. – Local zoning regulations, building codes, or HOA rules are reviewed.
Key Deliverables in This Stage:
– Stakeholder input on design preferences.
– Preliminary site inspection report.
Timeline: Typically completed within 1–2 weeks.
2. Design Customization and Material Selection
Based on the consultation findings, a tailored design plan is created. This step often includes:
– Choosing materials like chain-link, aluminum, vinyl, or wood based on durability and budget considerations. – Identifying additional features such as gates, automated openers, or security enhancements. – Creating design renderings for client review.
| Material | Benefits | Drawbacks |
| Chain-Link | Cost-effective; durable | Limited privacy |
| Vinyl | Low maintenance | Less suited for high security |
| Aluminum | Rust-resistant; aesthetic | Higher upfront cost |
| Wood | Natural appearance | Requires regular maintenance |
Timeline: This phase takes about 1–3 weeks depending on client approvals.
3. Obtaining Permits and Approvals
Securing permits from local authorities is critical to avoid compliance issues later in the project. During this stage: – All necessary paperwork is prepared and submitted. – Coordination with local utility companies occurs to ensure safe digging practices (e.g., identifying underground cables or pipelines).
Timeline: Permit approval can take anywhere from 2 days to several weeks depending on local jurisdiction.
4. Site Preparation
Once permits are secured, the site must be prepared for installation:
– Clearing away debris or vegetation near fence lines. – Leveling uneven terrain if required. – Marking boundary lines clearly using stakes or flags.
Best Practices for Site Prep:
– Use ground-marking paint for accuracy during excavation.
– Confirm measurements align with official property surveys.
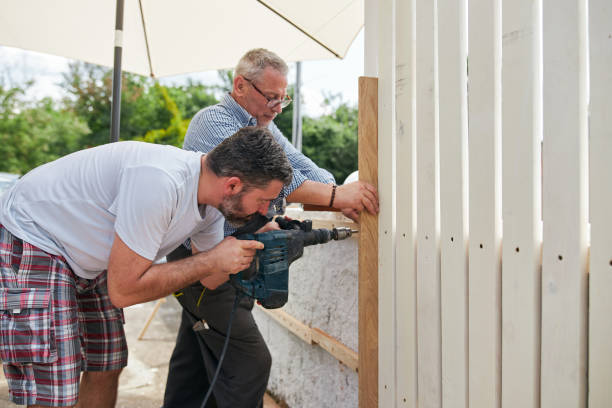
5. Fence Installation
This stage involves erecting posts, attaching panels or mesh wiring, and incorporating additional features like gates or locking mechanisms:
1. Post Setting: Fence posts are dug into pre-measured holes with concrete bases for stability. 2. Panel Attachment: Panels are securely fixed onto posts according to design specifications. 3. Gate Installation: Gates are added along entry points with required hardware.
Estimated Timeline Based on Fence Type:
| Fence Type | Installation Duration | |—————–|————————–| | Chain-Link | 1–3 days | | Vinyl | 2–5 days | | Aluminum/Wood | Depends on complexity (3–7 days)|
6. Final Inspection
The installation concludes with a thorough inspection by both the fencing contractor and property owner: – Ensuring all components meet quality standards. – Verifying alignment with design plans. – Addressing adjustments if needed (e.g., height corrections or lock placement).
Local inspectors may also review work to certify compliance with building codes before issuing final approval.
Conclusion of Process Highlights:
Completing all these stages ensures that your commercial fence is not only aesthetically pleasing but also functional and compliant with regulations—offering long-lasting value for your investment.
Key Stages of Commercial Fence Installation from Planning to Final Inspection
Installing a commercial fence is a multi-step process that requires careful planning, coordination, and execution. Each stage plays a critical role in ensuring the final product meets safety standards, functions effectively, and aligns with the client’s needs. Below is an in-depth look at the key stages involved in commercial fence installation.
gainesvillefencingprosusa.blogspot.com
1. Initial Planning and Site Assessment
- Site Survey and Measurements: A thorough inspection of the property to identify boundaries, uneven terrain, or obstacles such as trees or utility lines.
- Determining Objectives: Understanding the specific purpose of the fence — whether it’s for security, privacy, access control, or aesthetic purposes.
- Budget Development: Estimating costs based on materials, labor, and any additional features like automated gates or surveillance systems.
- Permits and Regulations: Ensuring compliance with local zoning laws and obtaining necessary permits to avoid legal complications later in the project.
2. Design and Material Selection
- Chain-link (cost-effective and durable)
- Aluminum (lightweight with modern aesthetics)
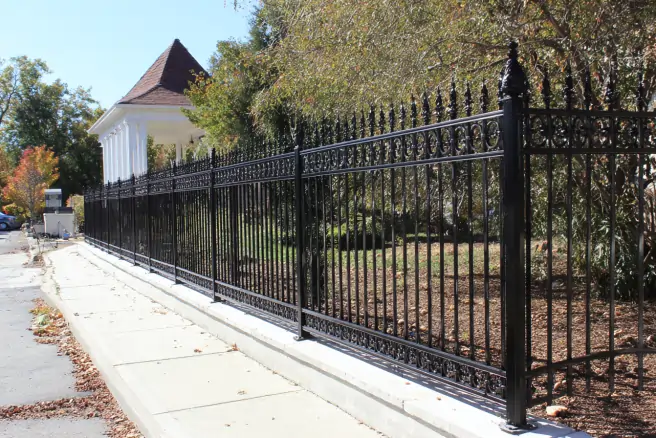
- Wrought iron (high-security option with added elegance)
- Vinyl (low maintenance)
| Material | Durability | Cost | Maintenance | Use Cases |
| Chain-link | High | Low | Minimal | Industrial areas |
| Wrought Iron | Very High | High | Medium | High-security facilities |
| Vinyl | Moderate | Medium | Low | Decorative applications |
Height Specifications: Depending on local regulations or specific needs such as preventing unauthorized entry or protecting sensitive areas.- Customization Options: Gates, color finishes, barbed wire additions for security fences.
3. Preparing the Site
- Clearing vegetation or debris obstructing proposed fencing lines.
- Marking boundaries accurately with stakes.
- Excavating post holes while avoiding underground utility lines.
Proper preparation minimizes risks of structural weaknesses post-installation.
4. Fence Installation
- Posts are installed securely into pre-dug holes using concrete for stability.
- Panels or fencing material are attached to posts following design specifications.
- Gates are installed where required with hinges or automated openers if applicable.
5. Inspections and Final Adjustments
- Conduct thorough inspections for structural integrity.
- Ensure gates open/close smoothly; test automation if installed.
- Address client feedback by making minor adjustments such as leveling panels or tightening fittings.
By following these key stages diligently from start to finish, commercial properties can achieve long-lasting fencing solutions tailored perfectly for their needs while adhering strictly toward legal standards & visual harmony
Common Challenges That May Cause Delays in Commercial Fence Installation
Installing a commercial fence is a significant undertaking that requires careful planning and execution. However, despite best efforts, certain challenges may arise that can delay the installation process. Understanding these potential roadblocks in advance can help property owners and contractors minimize disruptions.
1. Permits and Approvals
- Incomplete Applications: Missing documents or incorrect paperwork can lead to lengthy back-and-forth communication with local authorities.
- Zoning Restrictions: Certain areas may have restrictions on fence height, materials, or placement.
- HOA Rules (if applicable): If a commercial property is within a managed community, additional approval from a homeowners’ association or governing body might be required.
To mitigate this challenge: – Start the permitting process early. – Work with experienced contractors familiar with local regulations.
2. Unexpected Site Conditions
- Uneven Terrain: Sloped or rocky terrain can complicate digging and leveling.
- Underground Utilities: Identifying underground electrical cables, water lines, or gas pipes requires thorough surveys to avoid damage and delays.
- Soil Quality: Certain soil types (e.g., sandy or clay-heavy soils) may require extra preparation for proper fence post anchoring.
A professional site assessment prior to installation is essential to address these issues proactively.
3. Weather Conditions
Adverse weather conditions are among the most unpredictable factors that can delay fence installations. Heavy rain, snow, or extreme heat can make it difficult for crews to work efficiently and may compromise the quality of materials like wood or steel during installation.
To plan for weather-related disruptions: – Schedule installations during favorable seasons when possible. – Use weather-resistant materials if working in regions prone to harsh climates.
4. Material Procurement Issues
- Specialty materials (e.g., custom gates or high-security fences) often take longer to produce.
To reduce material-related setbacks: – Order materials well in advance. – Confirm availability with suppliers before finalizing deadlines.
5. Labor Availability
The availability of skilled labor is another factor that could lead to delays. Contractors often face scheduling conflicts due to multiple ongoing projects or workforce shortages during busy months.
Best practices include: – Hiring reputable contractors who have sufficient staff for large-scale projects. – Establishing a clear schedule upfront with contingency plans for potential labor shortages.
Summary Table of Common Challenges
| Challenge | Possible Cause | Solution |
| Permits & Approvals | Zoning laws; incomplete applications | Begin permit process early; hire experts |
| Unexpected Site Conditions | Uneven terrain; poor soil quality | Conduct detailed site inspections |
| Weather Conditions | Rain; snow; extreme heat | Schedule based on forecasts; use durable materials |
| Material Procurement Issues | Supply chain disruptions | Order early; verify supplier timelines |
| Labor Availability | Workforce shortages | Partner with reliable contractors |
By addressing these challenges proactively through meticulous planning and collaboration with experienced professionals, commercial fencing projects are more likely to stay on schedule while meeting quality standards essential for long-term functionality and security.
Finding the Right Fencing Contractor Gainesville FL for Automated Gates and Security Solutions
Automated fence gates and gate openers have become essential components for securing commercial properties. These advanced systems not only enhance access control but also provide convenience, efficiency, and an added layer of safety. Below, we explore the benefits, key features, and considerations when implementing automated solutions for commercial fencing.
Benefits of Automated Fence Gates
- Automated gates restrict unauthorized access by requiring credentials such as keycards, codes, or biometric verification.
- They can integrate with surveillance systems, offering real-time monitoring and recording capabilities.
- Remote operation allows employees or authorized personnel to open and close gates without leaving their vehicles.
- Timed operations can automate opening and closing schedules to align with business hours.
- For busy commercial properties, automated gates streamline vehicle movement and reduce congestion at entry points.
- Sensors ensure faster access during peak hours while maintaining security protocols.
- Sleek designs enhance curb appeal while reflecting a professional image that aligns with the business’s values.
- Despite higher upfront investment, automated systems reduce manual labor costs for security staff in the long run.
Types of Automated Gate Systems
| Type of Gate | Description | Common Use Cases | Benefits |
| Swing Gates | Open inward or outward like a door | Small to medium-sized properties | Simple design; space-saving when installed properly |
| Sliding Gates | Slide horizontally along a track or cantilever system | Properties with limited space behind the gate line | Ideal for areas with uneven terrain |
| Vertical Lift Gates | Lift vertically to allow passage underneath | Facilities requiring tight security like warehouses or factories | Space-efficient; highly secure |
| Bi-Folding Gates | Fold inwards in sections like accordion doors | Fast-paced environments such as parking lots or distribution centers | Quick operation; compact design |
Key Features to Look For
- Integration Capabilities: Ensure compatibility with intercoms, CCTV cameras, and access control systems.
- Safety Mechanisms: Look for anti-crush sensors, emergency stop functions, and manual override options.
- Durability: Materials such as steel or aluminum ensure longevity against weather conditions and heavy usage.
- Energy Efficiency: Solar-powered gate openers are eco-friendly alternatives that reduce electricity consumption.
- Customizable Access Controls: Options like RFID readers or PIN pads cater to specific security needs.
Installation Considerations
- Assess property dimensions thoroughly to select an appropriate gate type and size.
- Ensure power supply requirements are met—this may include installing underground wiring or solar panels.
- Work with experienced professionals who adhere to local regulations regarding automated fencing systems.
- Conduct routine maintenance checks on motors, tracks, hinges, sensors, and software updates post-installation.
Automated fence gates combined with modern gate openers offer businesses an effective solution to secure their premises while improving efficiency. By selecting the right system tailored to your needs—and ensuring proper installation—commercial property owners can enjoy peace of mind knowing their assets are well-protected through advanced technology solutions designed for reliability.
- Key Factors That Impact Timelines for Fence Installation Gainesville FL
- How a Fence Company Gainesville FL Can Help Solve Common Fencing Problems and Boost Your Property’s Security
- Step-by-Step Guide to Fence Repair Gainesville FL and Installation Timelines
- How to Identify and Verify the Best Fencing Contractor Gainesville FL for Your Needs
- Effective Solutions for Fence Installation Gainesville FL Homeowners Should Know
- Fence Repair Gainesville FL: Common Issues and Effective Fixes for Your Property